.Net Core Authentication with JWTs
This is the second post in a series on authentication between an Angular app and a .Net Core Web API Server using JWTs. In this post we go through the basics of securing the backend.
Posts in this series
- A Brief Intro to JWTS (Part 1)
- .Net Core Authentication with JWTs (This Post)
Versions used in this post
- .Net Core 2.1
The Setup
.Net Core Project
We’ll begin by creating a basic backend with a single endpoint that returns an array of strings. See this post for instructions. For testing our endpoint we’ll use Postman to send and receive HTTP requests and responses.
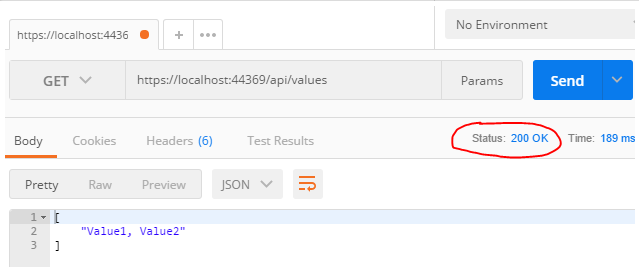
We test our setup by running the server locally and confirming our endpoint is working as it should be. The screenshot below shows the result of hitting the endpoint in Postman:
Settings
To issue and authenticate JWTs we’ll need a few settings such as:
- The secret key used to cryptographically sign the JWT
- Some JWT claim values to signify who created the JWT (iss) and who the JWT is intended to be used by (aud).
We do this by adding an appsettings.json to our project:
// appsettings.json
{
  "Tokens": {
    "Key": "SOME_RANDOM_STRONG_STRING",
    "Issuer": "https://umarmohammed.github.io",
    "Audience":  "https://umarmohammed.github.io"
  }
}
Note that ideally you should store keys and secrets somewhere better than the settings file (such as the Azure Key Vault). See the documentation for a discussion on this. Also note that you should use a more secure secret for your JWT key. See this blog post for more details.
Securing the Enpoint
Authorize Attribute
The simplest way of securing an endpoint is by using the AuthorizeAttribute. See the documentation for more details.
// ValuesController.cs
[Authorize]
public ActionResult Get()
{
    return Ok(new[] { "Value1, Value2" });
}
By adding this attribute to the action we’re saying “only allow authenticated users to access this endpoint”. Hitting it from Postman we see the following:
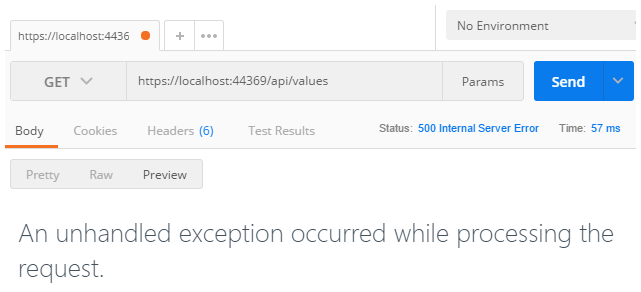
The server returned a response with a 500 status code. So what went wrong? Although we limited access to the endpoint, the application is complaining that we haven’t told it how to authenticate requests. We’ll do this next by adding JWT authentication middleware into the app pipeline.
JWT Middleware
Configuring the server to use JWT Authentication is pretty straight forward. We add the authentication middleware to app and configure the services to use JWT authentication with settings we defined in appsettings.json:
// Startup.cs
public class Startup
{
  private readonly IConfiguration _configuration;


  public Startup(IConfiguration configuration)
  {
      _configuration = configuration;
  }


  public void ConfigureServices(IServiceCollection services)
  {
    services.AddMvc();

    services
      .AddAuthentication(options =>
        options.DefaultScheme = JwtBearerDefaults.AuthenticationScheme)
      .AddJwtBearer(jwtOptions =>
        jwtOptions.TokenValidationParameters =
        new TokenValidationParameters()
        {
            ValidIssuer = _configuration["Tokens:Issuer"],
            ValidateIssuer = true,
            ValidAudience = _configuration["Tokens:Audience"],
            ValidateAudience = true,
            IssuerSigningKey =
              new SymmetricSecurityKey(Encoding.UTF8
                .GetBytes(_configuration["Tokens:Key"]))
        });
  }


  public void Configure(IApplicationBuilder app,
    IHostingEnvironment env)
  {
      if (env.IsDevelopment())
      {
          app.UseDeveloperExceptionPage();
      }

      app.UseAuthentication();

      app.UseMvc();
  }

}
Note we access the configuration we defined in the appsettings.json by injecting
IConfiguration.
Use a Global Filter
Instead of using an [Authorize] filter on each controller or action we can set the default authentication policy to require users to be authenticated:
// Startup.cs
public void ConfigureServices(IServiceCollection services)
{
    services.AddMvc(config =>
    {
        var policy = new AuthorizationPolicyBuilder()
          .RequireAuthenticatedUser()
          .Build();
        config.Filters.Add(new AuthorizeFilter(policy));
    });

    // ...
This means all newly added controllers and actions are protected by default. This prevents against accidently adding a controller and forgetting to add the [Authorize] filter. With this policy in place, we can go ahead and remove the [Authorize] filter we added to the Values Controller.
Let’s try hitting the endpoint again from Postman.
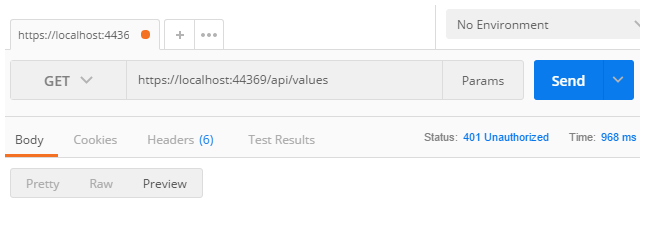
This time, as expected, we get a response with a 401 Unauthorized status.
Generating JWTs
So far we’ve managed to restrict access to our endpoint. This is great, as it means it’s protected from unauthorized users. What’s not so great, however, is that we haven’t created a way for users to get authenticated. Let’s take a look at how we can do this.
Token Endpoint
For a client to access our endpoint, it needs to send a JWT when making a HTTP request. In particular it needs to send a JWT (generated by us) in the Authorization header using the bearer authentication scheme. The way we acheive this is by creating an another endpoint that:
- Is unprotected so can be accessed by unauthorized clients.
- Accepts POST requests with some user credentials in the request body.
- Does some checks on the user credentials, and if happy returns a JWT in the response.
Let’s take a look at the code.
- We define a model class to bind to the user credentials in the POST request:
// CreateTokenRequest.cs public class CreateTokenRequest { [Required] public string UserName { get; set; } [Required] public string Password { get; set; } } - We create a new controller with an enpoint for generating JWTs:
// AuthController.cs
[Route("api/[controller]")]
[ApiController]
public class AuthController : ControllerBase
{
  private readonly IConfiguration _configuration;


  public AuthController(IConfiguration configuration)
  {
    _configuration = configuration;
  }


  [Route("token")]
  [HttpPost]
  [AllowAnonymous]
  public ActionResult CreateToken(CreateTokenRequest createTokenRequest)
  {
    if (createTokenRequest.Password != "Password")
    {
        return BadRequest("Invalid password");
    }

    var claims = new Claim[]
    {
        new Claim(ClaimTypes.Name, createTokenRequest.UserName),
        new Claim(JwtRegisteredClaimNames.Sub,
          createTokenRequest.UserName),
        new Claim(JwtRegisteredClaimNames.Jti,
          Guid.NewGuid().ToString())
    };

    var key =
      new SymmetricSecurityKey(
        Encoding.UTF8.GetBytes(_configuration["Tokens:Key"]));
    var credentials =
      new SigningCredentials(key, SecurityAlgorithms.HmacSha256);
    var token = new JwtSecurityToken(
        issuer: _configuration["Tokens:Issuer"],
        audience: _configuration["Tokens:Audience"],
        signingCredentials: credentials,
        expires: DateTime.UtcNow.AddMinutes(30),
        claims: claims
    );

    return Ok(
      new
      {
        token = new JwtSecurityTokenHandler().WriteToken(token)
      }
    );
  }
}
Note the
[AllowAnonymous]filter, which allows unauthorized users to access the endpoint. This is required in our example since all controller and actions require users to be authenticated by default.
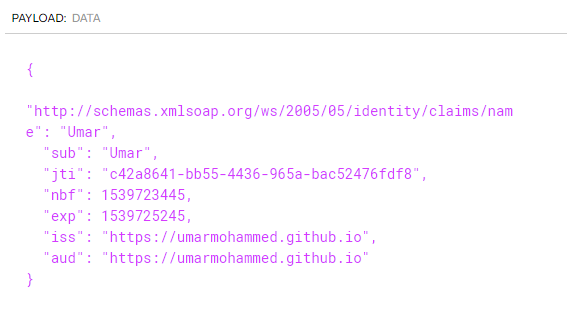
This endpoint simply authenticates the request by checking if the password is equal to “Password”. If so, it creates a new JWT with a “name” claim set to the UserName in the request. We also set some of JWT registered claims such as “sub” and “jti” (see https://tools.ietf.org/html/rfc7519 for more details).
Note that simply checking that the password matches a string is not a secure way of doing authentication. In practice a more sophisticated approach to checking the credentials should be used.
Getting a token
Let’s try out this new endpoint in Postman.
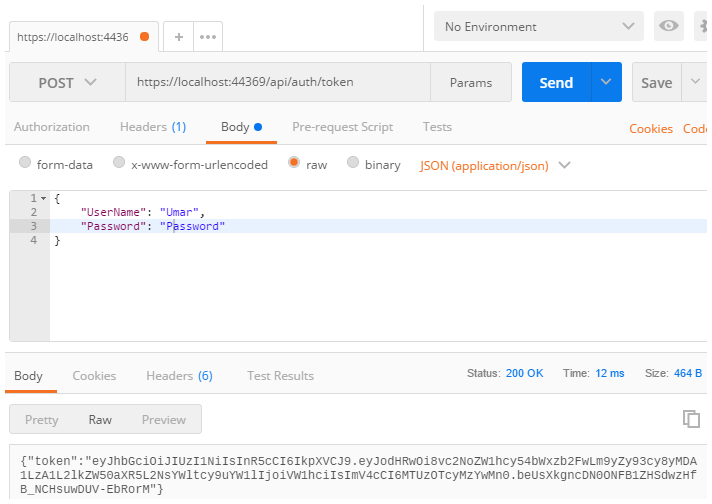
Great, we see that the server returns a JWT token. As discussed in Part 1 of this series, a JWT is simply a base64-url encoded Json object. This means that we can decode the token to see the payload. A good resource for doing this is jwt.io. The screenshot below shows the decoded payload of the token.
Making Authenticated Requests
Finally we are ready to make authenticated requests. We hit our values endpoint again, this time sending JWT in the Authorization header.
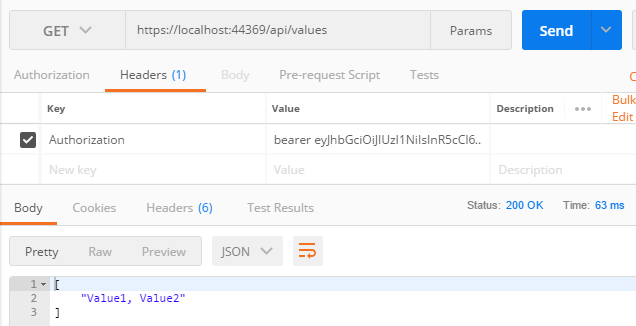
Note we prefixed the token with “bearer” as defined here.
As expected, the request is authenticated and the server returns a 200 status response.
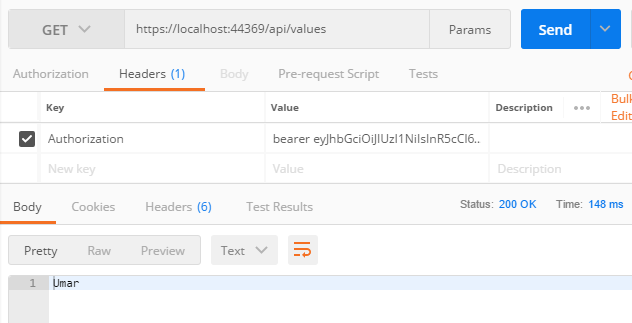
Finally, we can also get the User’s name from our controller action by using the User.Identity.Name property. We’ll go ahead and edit the action to return the name:
// ValuesController.cs
[Route("api/[controller]")]
[ApiController]
public class ValuesController : ControllerBase
{
  public ActionResult Get()
  {
    return Ok(User.Identity.Name);
  }
}
Note that this works because we set the
ClaimTypes.Nameclaim when generating the JWT.
Calling the endpoint from Postman we see:
In this post we saw how to authenticate our .Net Core application using JWT Bearer Authentication. The next post in this series looks at how we use JWT Authentication from an Angular client.